 Loading...

Choosing the correct GoPro settings is what makes the difference between success and failure.
Part 1 of this article will help you choose “GoTo” settings that you can rely on whenever you pull out your GoPro, and explain why they are suitable. It’s always better to start from something that you know and understand before exploring all the many features and settings that your camera has to offer. Get the choice of these three nailed and then start playing with other options when you have some time to spare.
Part 2 briefly covers several other settings that are worth checking out.
If at the end of the article you decide that you would like to explore settings in more depth, you can either grab our Free pdf explaining Resolution, Field Of View and Frames Per Second, or you can get a copy of our recommended resource the Project GoPro eBook which covers a variety of GoPro skills in greater depth.
GoPro Settings Part 1: Find A “GoTo”
-
-
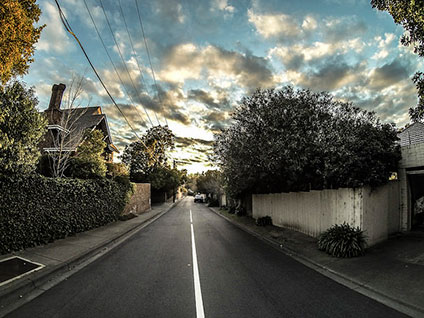
1080p / Wide / 60fps
-
Probably the most versatile setting you can choose.
Pros:
- High quality image.
- Angle that’s wide enough give excellent peripheral vision, even close up.
- Frame rate that will give the option of producing reasonable slow-motion if the mood takes you during editing.
At 1080p this provides the best HD quality that the major of screen manufacturer systematically support at a reasonable price, and with the least hassle. Why the least hassle? 2.7K and 4K are without doubt major break-throughs, but they come at a price. At 1080p, and with 60 frames per second, you’re already going to start capturing a large amount of data. That data has to be transformed and stored very rapidly; at this setting everything should cope well both during filming, and as importantly during editing. The high setting will start to complicate things, especially if your editing equipment has limited resources.
If your GoPro has a habit of switching OFF when recording on this setting either make sure the Protune is switched OFF, change the frame rate to 30fps, or use the setting below.
-
720p/ Narrow / 120fps
Great for giving a more focused, enclosed feeling. Sometimes having a Wide angle can take the edge of your film; literally(*).
Use this setting if:
- Posting the video on social media. It’s ideal, and few people will notice a difference in quality.
- You know that Slow Motion will be imperative when editing. This will give you loads of scope without having to regenerate frames to fill gaps during post production. Remember to check that your software can import at this frame rate.
- You need the film to have a more focused, or faster feel, reducing the Field Of View can help (you can also try this at 1080p). Focal points such a Speedometer on a motorcycle will appear to take up real estate on the screen, and passing objects will appear to close in and pass more rapidly.
Reducing the Field Of View in the GoPro settings also reduces the amount of data being transformed, hence reducing the risk of the camera blocking and heating, without affecting picture quality.
(*)The Wide angle occasionally creates warping or ‘aliasing’ around the edges of the image. This isn’t the classic goldfish bowl optics of a ActionSports camera; this is a technical issue concerning data transfer, where the rate of information becomes too high and the camera process starts throwing away bits of information to keep up with pace.
-
1440 / Wide / 30fps
This GoPro setting produces a nice clean “classic” feel with exceptional quality. You may feel the need to do some dynamic stretching during editing, or you may find you can reframe to suit proportions, but the quality should stand up to it. There’s no real need to do this, and the lack of aliasing with this setting makes for a very crisp video.
**************************************************
If you do decide that you really want a masterclass on GoPro Settings we recommend the ProjectGoPro eBook that will cover everything you need in detail.
**************************************************
GoPro Settings Part 2: Others Things You Should Check
SD card: before you start
- Always format the SD card in the camera before doing anything.
- The FORMAT option is found under the “delete” menu. This is logical for an Engineer, who would format the card after downloading and deleting the files from the camera. Many camera users have an inbred fear of delete buttons, or may have deleted directly from the computer, so the Delete menu may not be the natural choice searching for a formatting command.
- When moving files from the camera to a computer, take the SD card out and place it in a card reader rather than transfer by USB.
See Explaining SD Cards And Classes to avoid the pitfalls that some manufacturers lure you into…
For a FULL LIST of resolution setting and their attributes check out the GoPro Picture Quality.
-
What Do The GoPro Settings For PAL and NTSC Mean?
To set your camera this depends on your region. For the States it’s NTSC, and most Europeans have PAL. There are regions with SECAM and MESECAM, but if you are in doubt check.
The obvious differences that you will see are in the frame rates when setting your filming mode. NTSC works in multiples of 30, whilst PAL has multiples of 25. This is to take into account the difference in power standards between America (60 Hz) and Europe (50 Hz). To give a more visual example, anyone who has landed at night in a plane may have noticed that the lights below on the main roads appear to ripple of flicker; this is the effect of the electricity cycling over a distance. Choose the wrong settings in your editing software and you may get the same type of flicker.
-
GoPro Settings For Photos
Leave it on 12 MP wide. After transferring to your computer, you can crop, zoom, or re-frame during post-production. The GoPro effectively just scales the frame size down by cropping internally, so you may as well do this yourself and have the choice of re-positioning the frame as you want it. Unless you are looking to squeeze in more photos on your SD card then there is no real reason to change mode.
-
Protune
During the day: Put it on auto and it will give your footage a consistent look. If you think the colors look flat and the picture not very sharp when you look at the film, that’s good, that’s what it’s meant to do, don’t be alarmed. In reality, things are not extra sharp and colors are not over vibrant; most consumer cameras add this digitally. Professional ones spend their time gathering as much information as possible allowing the editor to make better color correction and sharpness during post-production.
At night: Switch it off. It creates ‘noise’ and that ruins the extra detail you’re getting.
-
Simultaneous video and photo
There are two ways of capturing photos whilst recording video; either pressing the power/mode button at any time during video recording, or setting the camera to take a photo every 5, 10, 30, or 60 seconds during video recording.
The photos will match the aspect ratio in whatever mode you are filming at the time. The results will not be the same quality as a 12 MP photo but they will be as good as high-resolution video screen grab, so depending on intended use afterwards (photo on the wall, or photo in a video) you may want to think about which mode to use; a specific photo mode will be better if you’re intending to hang it in the office.
-
Loop recording

Changing the GoPro settings to loop video footage.
What’s that I hear you say! I can change GoPro settings to use it like a security camera; if you plug the camera into a power source and leave it running you can set the time so that you always have the last ‘X’ number of minutes that you filmed. The only difference being that a security camera would do this for 24 or 48 hours and your GoPro will do this for 10, 20, 30 minutes, etc.
If you’d rather just watch some video to get you rolling, try this:
- [radium_embed_video title=”Choosing The Best GoPro Settings For Resolution, Frame Rate and Field Of View” link=”https://www.youtube.com/watch?v=HLH5LhGjRLc” size=”650 x 500″ fullwidth=”yes” lightbox=”no” thumbnail=””]
**************************************************
Need a masterclass on GoPro Settings? We recommend the ProjectGoPro eBook that will cover everything you need in detail.
**************************************************
Follow the link if you would like to find out more about different GoPro settings and models.
Learn More…
A.I Beta Tester Rewards Program
1.Login 2.Connect 3.Earn Rewards
A.I Beta Testers Wanted
1.Login 2.Connect 3.Earn Rewards
Find Out More