by Hayden Scott | Jun 19, 2013 | Tech
Quick Guide To Grasp The Basics Of Video Editing Workflow
There are many options out there when it comes to editing suites, and we’ve reviewed some of the better known ones. The market generally renews itself at the same pace as Moore’s Law so newer versions of products are constantly coming into the stores.
Buy a suite that fits the specification of your computer. Getting software that’s badly suited to ageing hardware will frustrate you, as certain CPU functions that claim to speed up the process are actually only compatible with newer CPU’s. So if you can’t afford to update your hardware buy an older version of the software you want, and make shorter videos with less layers.
Direct MP4 compatibility will save you time and a whole lot of drive space when it comes to importing, so it’s money well spent. Buy software without it and if you’re a compulsive GoPro user you may rapidly find you also need to buy a new hard drive to find room for converting files.
If you’re a web nut the latest batch of offerings are giving html 5 coding which will produce code for you to embed in you own site. The average user will have zero use for this, as good as it sounds on the packaging.
If you’re a newbie to editing buy software with ‘in your face’ icons. Efficient editing is all about knowing what you can use and where to find it. The cheaper entry level suites accomplish this by placing the most needed functions on big icons that remain in view on the work-flow interface. This can save lots of time because you instantly know where it is and what it does.
Output formats are not really an issue these days as most standards are supported by most editing suites.
Pay special attention if you have a Mac as some suites are not compatible.
Video Editing Workflow: In More Depth
Choosing software that’s right you is often about feeling comfortable with the look and feel of the user interface. Finding something that you can work efficiently with in terms of the interface can be much to do with personal preference. You may be spending many hours at a time staring at the screen so the quicker and easier it is for you to find your way around the better it’s going to be.
Trying out different versions at the local store is the best option, otherwise trial versions or a friend’s software could be a way of finding your comfort zone. There’s no real right or wrong as everybody has individual tastes and customising screen layout to suit the way you work may be a trial and error process. As a general rule, ease of use is top of the list, so you should be looking for icon sets to you identify with rapidly and the ability to make and edit in no more than two clicks. Don’t settle for anything were a basic task may take several menus or clicks.
Capture and Playback
As discussed in the Video Basics article about MP4 having an editing software that matches the format is a huge bonus. If you have other camera equipment, don’t forget to take them into consideration and make sure that it matches all your needs.
Editing systems generally have two main approaches in terms of screen layout – either timeline or storyboard. A preference for one or other of these approaches will obviously influence your decision, but most systems now give you the opportunity to change rapidly between both. Storyboard is a simplified ‘comic-strip’ consisting of icons or thumbnails that you drag-and-drop around the screen to alter the sequence of events.
Timeline is a more specific view showing a linear representation of the project. Tracks may have individual colors to allow your eye to pick out different types of events more rapidly, and multiple tracks for both audio and video, as well as titling, running vertically down screen. The basic commands like cutting and pasting are relatively standard, but the more specific editing tasks (such as trimming and audio matching) are really the features that begin to separate the entry-level systems from more expensive ones. The quality when it comes to correcting poor lighting, matching video of different quality, changing aspect ratios, are other types of features you would expect to see with the increasing price level.
If you’re new to the game then a library of built-in effects, both video and audio, will be a bonus, whereas being given the choice to create, customize, and save one’s own effects would certainly be more interesting to an intermediate or someone who feels they are beginning to outgrow the simplified system that they have been using. Cleaning audio inside the editing suite without the need for separate software can be a huge bonus. Audio can be a big issue that can really make or break your video as a finished film is about the whole package and not just the visual side.
Rendering
Software has progressed well to work hand-in-hand with today’s CPUs and handle the kind of render intensive tasks that we used have to put up with. We now have faster processors, more of them, and programs that are capable of background rendering to make use of this extra power. But whilst hardware and software manufacturers were hard at work so were the camera manufacturers, and now we have to deal with huge, sometimes uncompressed, HD video. So speed can often still remain an issue. On top of that the video quality and the intensity of the other tasks that you’re putting on it may also weigh heavily. Put simply the more post-production you have to do, be it by choice to improve the video quality, or by function to apply effects, titles, overlays, etc, the more pressure you’re going to put on the system and especially the CPU. Matching a software works well, or has been designed for, the CPU that you have will be a bonus. If you’re somebody who likes straight POV with no-frills you’re in for an easier time than somebody who likes to lay on the special effects.
Output or Export
Once you’ve finish playing and you’ve added, removed, and tweaked everything you can think of, it’s time to get it out of your computer and into a format that suits the viewing public. If YouTube is your thing then many of today’s programs offer a direct export, and hence an automatically chosen format. If that’s not the case then possible formats such as Flash video, MPEG, WMV, or MOV (for QuickTime) are all popular export formats offered by most good editing programs.
If it’s going onto discs then MPEG 2, or Blu-ray for the forward thinking among you, is crucial. Most programs have DVD authoring tools built-in, whilst some people prefer dedicated DVD authoring programs.
Support
No software is complete without the ability of the user to create his heart’s desire and so technical support whether it be in the form of documentation, video tutorials, or online forums is a requirement whatever your competence level. Built-in links to help tools are useful, but don’t forget to look up specific user groups online for individual programs.
So what’s best?
What’s best for you is not necessarily best for someone else. We’ll bring you more reviews to help you out, but always go for something you feel comfortable with, preferably having already tried it to assess your own ability, and that is also well matched to your hardware.
by Hayden Scott | Jun 8, 2013 | Other

Alsace Freeride Academy Offer Training At All Levels
Gaining momentum and boosting the capacity of all the riders who join their ranks, there’s a whole new dynamic coursing through the veins of eastern France. With some thoroughbred world-class MTB names having be born or trained in this corner of the hexagon, the temptation is always high to refine skills daily with access the Academy on the doorstep. With the mountains in plain site of the Academy’s jump park, skinnies, and wall-ride it only encourages you to take your new found techniques to the hills and then come back to get some more…
AFA: Learn to Flow
The inauguration of an outdoor Bike-park in May 2013 marked the official start of the A. F. A.. Situated close to Mulhouse in the stunningly beautiful Upper Rhine region of France, the area is pivotal and multicultural, highlighted by the intersection of the French, German, and Swiss borders. This site will offer a vast pump-track, several freeride/slopestyle lines, a jump park, a skill center, several areas for working maneuverability and coordination, as well as a big airbag. According to the different time slots, the management will propose secure access to this evolutionary area, individual and group training courses for skills and control, and numerous events (contests, competitions, demonstrations, themed evenings … )
The project, that was created at the end of 2011, consists of a vision progressing in several steps:
- The opening of an Indoor Bike-park based in Alsace during 2014.
- The creation of several indoor/outdoor sites throughout France, as well as the development and production of MTB/BMX specialist bike parts in 2015.
During the progression of these three stage The Alsace Freeride Academy has the following main objectives:
- The development of MOUNTAIN BIKING and BMX disciplines,
- The creation of employment as the project evolves,
- The creation of a strong regional dynamism around the AFA spots.
We’ll be with these guys during the construction and testing of the site, coordinated by a world class shaper. Look out for it coming online during spring 2013.
Man Behind The Goggles:
Hugo DE LA LOSA
Disciplines: BMX and motocross and for the last several years mountain biking.
Previous Finest Moments:
- Manager of the UCPA “Espace Glisse” in Paris (3300m2 covered skatepark – 30K visitors/year)
- Mountain biking Freeride/DH instructor in Val d’Isère
- BMX Coach for several clubs in Normandy
Experience:
- European Winter X Games in Tignes
- International Festival of the Extreme Sports in Montpelier and Paris
- World of Mountain Biking- (now part of Crankworx)
- Working meetings with the Ministry of Sports on the establishment of the new vocational training in the field of the cycle and on the development of alternative sports practices.
Paperwork In The Back Pocket:
- STAPS DEUG and License “Education and Motor Functions” – University of Caen
- MASTER STAPS “Professional Sports Management and Sports Organisations” – University of Caen
- Professional Cycling Sports Trainer (BEESAC)
- Certified by the French cycling Federation: 1st, 2nd and 3rd degree, option BMX and MOUNTAIN BIKING
- Trained in First Aid
- Member of the union of French Cycling Instructors (MCF)
by Hayden Scott | Jun 6, 2013 | Tech
This article looks at two different sets of syptoms related to GoPro picture quality problems, and discusses the measures you should take to resolve them rapidly. It covers the common observations that you may see on the images, and then gives possible causes and solutions.
GoPro Picture Quality Syptoms Part 1
- Grainy finish to the film.
- Colors appear to have little contrast (washed-out).
Possible Causes
1. Light
Think simple first; Light will always have the biggest effect on the GoPro picture quality. The more of it you’ve got, the happier the camera will be. As a general rule you’ll rarely see any of the professional GoPro video on a rainy day, and even when underwater you’re always aware that there is brilliant sunlight just above the surface.
But, you can work around this…
[icon size=”tiny” icon=”icon-medkit” /]
Solutions
- On the camera itself slow things down a little. Reduce the frame rate if you are using a fast one, so that the images are processed effectively. If required, your GoPro will cut corners when processing to keep up with the demands you put on it. This has an effect on the GoPro picture quality when the video files prepared for storage.
- Off the camera, think ahead and wear bright clothing that will reflect light or add contrast. Creating an illusion of light can be an effective way of fooling the eye, and giving the impression that the GoPro picture quality is actually better than it is.
- Become a master in post-production. Play with atmosphere to produce an end result that suits the video you captured, rather than having a preconceived idea of what it should be like.
Nothing is different for professionals, they just invested more time and effort, and so can you.
2. Protune
Protune is a professional ‘tool’ that has to be understood to be used. If it’s unclear to you when it should and shouldn’t be switched on, and how it can be used to your advantage, then it may appear to do more harm than good. It seems unlikely that something that should enhance the GoPro picture quality may appear to do the opposite, but in reality sometimes it gives that illusion, and sometimes it does actual reduce the the quality.
[icon size=”tiny” icon=”icon-medkit” /]
Solutions
- Understand first. Protune actually captures more information than you are seeing, and that’s where the benefits lie. If you download the video to your computer and take a quick look in the Explorer window, chances are that you’ll feel disappointed.
Often the video appears to have little contrast between colors (hence the expression flat), and can occasionly look grainy. Where the magic happens with Protune is when it goes into post-production, so understand it first, which brings us to Solution 2.
- Find out how to maximize the benefits using your editing suit. All the ‘extra’ information that has been stored in the supporting files can be used to dramatically enhance your finished videos. If you have the software and the know-how then you’ll hit the bulls-eye. Don’t give upon footage until you’ve checked it out fully in your editing software and began to examine the dynamic range that has been captured.
- Especially at dusk or in extremely poor light, turn the Protune OFF. It can do more harm than good, and artifacts or ‘noise’ will start to appear that you just won’t be able to repair. If in doubt, leave it off until you know how to fully utilize it’s full potential.
************************************
If you decide that you really need a masterclass on GoPro Settings we recommend the ProjectGoPro eBook that will cover everything you need in detail.
************************************
GoPro Picture Quality Syptoms Part 2
- Jagged lines where there should be straight edges.
Possible Causes
1. Aliasing
This is distortion sometimes caused by the processing and storage rate of the camera.
With large amounts of data being the transfered certain parts of that information may start to be ignored. This is to keep up with the speed at which information is being captured and stored. The best place to start ‘forgeting’ information is around the outside and this will have an effect on the GoPro picture quality. Straight and regular lines appear slightly jagged, and moving images may appear to have a rolig area at the side.
[icon size=”tiny” icon=”icon-medkit” /]
Solutions
- Make sure that you have two or three settings that you fully understand. Nail these, have them as “GoTo” settings, and know that before trying everything else one of these suits the task forte day.
- Either read our GoPro Settings article to find out more or just use one of the follow.
- 1080p / Wide / 60fps or 30fps
- 720p / Narrow / 120fps
- 1440p / Wide / 30fps
GoPro Picture Quality Syptoms Part 3
- Black screen in Playback in Explorer or Finder
Possible Causes
1. Nothing Wrong With Your GoPro
Usually due to the fact that your computer doesn’t have the legs, and a very common problem for many people. This discovery is normally followed by panic at losing a days worth of video, then annoyance when you realise that you can hear the sound so you must have captured something.
[icon size=”tiny” icon=”icon-medkit” /]
Solutions
- Import it correctly into video editing software.
- Try viewing it through the GoPro Studio Software.
- Check driver updates for Graphics/Sound cards if all else fails.
- If your video editing software is not recent verify that is can direct import and handle MP4 files.
2. Something Wrong With Your GoPro
Worst case scenario, it is black. Maybe it’s not GoPro picture quality that is the problem; there’s actually no picture.
Solutions
- Verify that the SD card is really empty.
- Reformat the card in your GoPro.
- Check the GoPro software is up to date in case of any known bugs.
************************************
If you decide that you really need a masterclass on GoPro Settings we recommend the ProjectGoPro eBook that will cover everything you need in detail.
************************************
Final Word
Don’t forget that Knowledge is Power. Read up on your GoPro, your editing software, and any other techniques that may come in handy. Small things can make the different between “good” and “great”, and that can mean a good day and great day, not just the video.
by Hayden Scott | Jun 1, 2013 | Tech

Several symptoms related to GoPro update problems.
- You did a usb update and now the screen is reading Update Failure.
- The camera freezes up completely during use.
- The camera won’t switch on.
Most Successful Actions.
[icon size=”tiny” icon=”icon-medkit” /] Remove battery. Replace battery and turn back on. Leave the camera switched on for at least 10 minutes.
WHY:
- If the the camera has just frozen during use it will normally come back to life, but it could signal that you should check for an update.
- If you’ve just updated when the problem occurs, the software update requires time to install itself when you switch the camera back on. Sometimes this doesn’t happen cleanly and the camera gets a little lost along the way. We’ve had both Hero 2 and 3 beep back into life between the 5 and 10 minute mark, even when the screen appears blocked.
[icon size=”tiny” icon=”icon-medkit” /] Pull the card out and get it in the computer. If you have a card up to 32GB right click and format card FAT32. If you have 64GB card format it exFAT, (To get more info on 64GB cards on possible pitfalls with 64GB cards TAB to After Hours Clinic). Then do the follwoing:
- Carefully ignoring STEP 6 from the GoPro update page, follow the normal procedure but leave the usb disconnected.
- You’ll get a manual download button to click. Download the file, extract the contents and paste it directly onto your newly formated card.
- Now eject the card from the computer and ensuring that the GoPro is off put the card in place.
- Switch on and let the camera do its thing. The same rules apply as above, it will not spring into life instantly. The camera will switch on and of several times during the software installation so go and get a coffee for 10 minutes.
- The last time the WiFi will take a good few minutes to install and should read % marks as it progresses.
- Assuming it’s successful, reformat your card in the camera for good measure.
If it does freeze up go back to the removing battery and try again having done the manual installation. Failed Hero2 updates magically recovered after being left on for between ten and fifteen minutes. Whilst we wouldn’t expect this to be the norm, it does show that patiences can be a virtue.
[icon size=”tiny” icon=”icon-ambulance” /] Call the GoPro support line.
Hero Update worked, but Remote Control does not.
Symptoms related to Remote Control problems after update.
- You had the WiFi working before the update and now it’s stopped working.
- You can’t even find the Network when you search.
- Previously the devices connected automatically and now they do not.
Most Successful Actions.
Not uncommon as many people don’t like to fill in WiFi network details on line. But remember, this isn’t your home network we are talking about; it’s specific to your camera, generated by the camera, and only relevant to operating your camera.
[icon size=”tiny” icon=”icon-medkit” /]Try this:
- Go back up to GoPro.com and run through the download process again.
- When you get to the camera name and password put in some your details, or create new details. If you leave this empty you get a load of zeros in the “version.txt” and this has been known to screw up the WiFi.
- A text file where you did not fill in the data will be full of 0’s and look like this:
- {“info version”:”1.1″,”firmware version”:”HD3.03.02.00″,”wifi version”:”0.0.0.0″,”wifi bootloader version”:”0.0.0″,”wifi mac”:”000000000000″,”camera type”:”Hero3-Black Edition”,}
- Whilst a file where you took the time to fill in some details will have full numbers and look like this:
- {“info version”:”1.1″,”firmware version”:”HD3.03.02.00″,”wifi version”:”3.4.2.9″,”wifi bootloader version”:”0.2.2″,”wifi mac”:”d89685280060″,”camera type”:”Hero3-Black Edition”,}
- Reload the software as previously stated. If you remembered the correct details corresponding to the original name and password, chances are you won’t even need to pair them. If you filled in new ones, run through the pairing procedure as we described.
This has caused problems and we highly recommend that you follow the full procedure when given the opportunity during the download at gopro.com.
by Hayden Scott | Oct 21, 2012 | Tech

Comparing GoPro specifications against the competition isn’t the be all and end all, but a top level understanding can certainly help
Specification sheets are great but what does it mean in plain English. We all know that the Black ones the best but what if the numbers just don’t mean anything to you? Do you really need the Black Edition or are the others OK for what you want? And with the Contour having bit the dust (at least until it’s supposed 2014 relaunch!) and out of the picture, (pardon the Cliché), how does the Sony measure up at this price point.
Optics:
GoPro: White and Silver Editions have a sharp image. The HD Hero 2 had a sharp image and technology is not going backwards; yet.
3 Black Edition had 2 x sharper.
3+ Black Edition boasts 33% sharper that the original Black.
Low light capability:
Hero White Edition is the normal consumer quality, which is pretty good these days.
Hero Silver Edition is better than a standard camera, but not as good as a professional camera.
Hero Black Edition is a professional standard camera.
Contour +2 had: Unknown
Sony ActionCam: Carl Zeiss Vario-Tessar – Sony do have quite a long history in the camcorder industry, so you would expect the lens and processor to be strong points.
Lens angle adjustments:
GoPro: Choices of Narrow, Medium, Ultra Wide and now SuperView, varying dependant on shooting mode.
Contour +2 had: Wide (Fixed 170°).
Sony ActionCam: Wide without SteadyShot(170°), Medium with SteadyShot (120°).
Photo features:
Multishot:
GoPro Hero White Edition: 5 megapixels – 3 shots/second which is OK.
GoPro Hero Silver Edition: 11 megapixels – 10 shots/second which is pretty good.
GoPro Hero Black Edition: 12 megapixels – 30 shots/second which is exceptional.
Contour +2 had: 5 megapixels – No multishot
Sony ActionCam: 2 megapixels – No multishot
Timelapse:
All Hero Editions: have the same capacity – 0.5, 1, 2, 5, 10, 30, 60 second intervals.
Contour 2+ had: 1, 3, 5, 10, 15, 20, 30, 45, or 60 second intervals.
Sony ActionCam: 5, 10, 30, or 60 second intervals.
Video features:
Only the Hero Black Edition has 4k, 2.7K and 1440p (which gives you 4:3 screen size instead of 16:9). It can be useful but will eat your computer’s drive and RAM when editing.
Hero Black Edition has an advantage over the Silver Edition in terms of frame-rate, which means it will produce superior slow-motion video afterwards.
Contour +2 had:
Full HD -1080p (1920 x 1080) @ 30/25fps
Tall HD – 960p (1280 x 960) @ 30/25fps
Action HD – 720p (1280 x 720) @ 60/50 or 30/25fps
Slow Motion – 480p (854 x 480) @ 120/100, 60/50, or 30/25fps
Sony ActionCam:
Video Resolution : 1920×1080/30P (HQ), 1280×720/30P (STD,SLOW,SSLOW), 680×480/30P (VGA)
Advanced features:
Wi-Fi:
Hero: All have built in Wi-Fi so you can use Smartphone APP and remote controls with them. The Hero 3 Black Edition is the only model that is sold with the remote control.
Contour 2+ had: Smartphone APP control
Sony ActionCam: Smartphone APP control
Protune mode: Hero White Edition is not compatible with Protune. Protune works on both the Silver and Black Editions.
Simultaneous Video and Photo:
Only the Hero Black Edition has this function.
Video Bitrate Capture
Hero Black Edition has the highest capture rate and the other two are progressively lower.
Why does this matter? Basically the higher the bitrate the better the quality, but we’ll discuss that elsewhere. The knock on effect is that your SD card will need to be of a higher Class and hence more expensive, so bear this in mind in your overall budget.
Talking About 4K Resolution…
Don’t get dragged into the 4K debate. This is new to the market and currently only works at 15fps – that’s 10 frames per second down on PAL and half that of NTSC. There’s more than enough for your computer to deal with rendering 1080 and 1440 resolutions, so unless your equipped you’ll need the software and the processor power to deal with it if you intend to use these settings on the Black Edition.
There will be more data to churn, so spare batteries are also a good bet when ordering your kit, but bear in mind that good battery conditioning with regular cycling (flattening to zero and fully recharging) will go a long way to resolving disappointing battery episodes.
The traditional forums will be a thing of the past here. We’ll going to be bringing you the best solutions we’ve found to save you cruising 1500 threads on the same subject. So whether you’re a full-time GoPro fanatic or someone just thinking about a purchase we hope you’ll find something of interest.
As GoproTimes is about the experience and GoPro is just one of the tools, don’t forget the video editing software/hardware sections are just as relevant.
With careful consideration, a little imagination, and the expertise of P.O.V. lovers like yourself (who’ve already made mistakes, and claimed some victories) there’s no reason why we can’t all be turning out content that gets the audience feeling like they’re sat in your seat, whatever the style of film you decide to turn out.
by Hayden Scott | Sep 10, 2012 | Tech
CyberLink PowerDirector Version tested: 11 Ultimate
Versions Available: 11, 12 or 13 / 11, 12 or 13 Ultimate / 11, 12 or 13 Ultra / 11, 12 or 13 Deluxe.
[easyazon_cta add_to_cart=”default” align=”right” asin=”B00N4OLGL6″ cloaking=”default” height=”28″ key=”small-orange” localization=”default” locale=”US” nofollow=”default” new_window=”default” tag=”goprotimescom-20″ width=”120″]
Interface And Workflow
Providing all the standard tools to trim and adjust footage CyberLink PowerDirector leaves the originals files untouched which is always good methodology in this digital age. Cropping or zooming, clip speed adjustment, or catching a freeze frame are all possible and automated image enhancement is available for those unsure of themselves when it comes to knowing the different between their chroma and their luminance.
Drop and drag is now the standard way of placing transitions, effects, etc., so no surprises there and the Magic Fix/Magic Motion tools give the opportunity to cure shaky hand syndrome or pan/zoom within scenes. In fact, everything seems to be magic; Magic Cut finds the best quality footage, whilst Magic Style slaps on a pre-designed template.
The work-flow interface allows so many tracks that you, or rather your computers capacity, will get tired before the software. If you really want to use 200 video and audio tracks then maybe you should be working at a TV network because your home PC isn’t going to like it – prepare for a crash…
Sensibly most people wouldn’t even go there, in which case CyberLink PowerDirector optimizes soft and hardware performance to give a healthy increase the rendering process speed compared to previous versions.
Importing and Exporting
More than 20 formats can be imported into the Media Room, so if you have other equipment as well as your GoPro it’ll do the job. As with most editing suites, you can use a microphone to lay on a dialogue during post-production if you have to mute the screaming or the wind-noise from the original.
Export formats allow videos to be played on smartphones, PlayStation 3 and Xbox among other things, and end products are easily uploaded to the well-known social media sites. Single- and Dual-layer DVD formats are supported as is Blu-ray, and the tools to add titles, menus, and navigation on such formats are included forming part of this professional looking package.
With so much to offer, including 4K and 3D, you would be hard pushed to find such a good no-nonsense highly power piece of software at this price. In fact we’d probably say at any price, as the complexity tends to rise along with the currency. With nice touches like the beat detection to help you line up video with your music, this is where the amateurs smart cash would go.
[easyazon_cta add_to_cart=”default” align=”center” asin=”B00N4OLGL6″ cloaking=”default” height=”28″ key=”wide-orange” localization=”default” locale=”US” nofollow=”default” new_window=”default” tag=”goprotimescom-20″ width=”176″]
Pros
- Wide user base and community.
- Supports 4K footage.
- Version 12 now includes some new effects, such as tilt-shift.
Cons
- Can consume computer resources.
by Hayden Scott | Aug 8, 2012 | Tech
SD Cards Can Be Confusing. Don’t Get Caught Out
The most baffling thing about SD cards is the difference in price. Even if you understand all the different classes, the price difference between the major brands for what apparently would appear to be the same specification remains a mystery.
The most important thing to know is that all classes of SD cards are regulated by minimum standards set out by the SD Association, so as long as you buy one holding an authorized logo it meets the specification prescribed for the class number it holds.
Another important consideration is the environment you’ll be using it in. Higher price cards such as the [easyazon_link asin=”B00M55C0NS” locale=”US” new_window=”default” nofollow=”default” tag=”goprotimescom-20″ add_to_cart=”default” cloaking=”default” localization=”default” popups=”default”]SanDisk Ultra[/easyazon_link] will tend to be waterproof, dust-proof and vibration proof. Bear this in mind at all times because, waterproof housing or not, getting the card out on the beach will expose both camera and card to environmental issues (especially salt), and vibration is generally part and parcel of daily GoPro use. If in doubt, don’t render your camera useless with bad cards.

Which SD Card for my Hero?
First we’ll tell you which class you need for which GoPro in case you don’t require further on the details, and then for those who want a better understanding we’ll set out the “Class” rules.
SD card recommendations for all HERO 3 models would be:
32GB SDHC Class 10 – See Doctors Page for more info if you are wondering why 64GB is not the way to go; at present.
If you are on a budget the possible options are as below. Note: lower class cards will function, but use of Protune or rapid time-lapse is not recommended.
Black Edition:
- [easyazon_link asin=”B00IVPU786″ locale=”US” new_window=”default” nofollow=”default” tag=”goprotimescom-20″ add_to_cart=”default” cloaking=”default” localization=”default” popups=”default”]micro SD Class 10[/easyazon_link], micro SDHC Class 10, SDHC UHS-1, SDXC UHS-1, Up to 64GB
Silver Edition:
- micro SD Class 10, micro SDHC Class 10, SDHC UHS-1, SDXC UHS-1. Up to 64GB
White Edition:
- [easyazon_link asin=”B00IVPU786″ locale=”US” new_window=”default” nofollow=”default” tag=”goprotimescom-20″ add_to_cart=”default” cloaking=”default” localization=”default” popups=”default”]micro SD Class 10[/easyazon_link], micro SDHC Class 10, SDHC UHS-1, SDXC UHS-1. Up to 64GB
Considering today’s prices, our recommendation for the previous HERO models would be: 32GB SDHC Class 10.
HD HERO 2 Edition:
- [easyazon_link asin=”B0020ZDI5C” locale=”US” new_window=”default” nofollow=”default” tag=”goprotimescom-20″ add_to_cart=”default” cloaking=”default” localization=”default” popups=”default”]SD, SDHC, Class 4[/easyazon_link] if recording in HD. Up to 32GB
Naked Edition:
- SD, SDHC, Class 4 if recording in HD. Up to 32GB
960 Edition:
- SD, SDHC, Class 4 if recording in HD. Up to 32GB

Common tactics employed by certain manufacturers
This card is rated as a class 4, which means that the cards does not perform high enough to gain a Class 10 rating which would put it in the the range of 10Mb/s, so stamping 15Mb/s on it, even if the asterisk small print states that it is a potential value is blatantly just a marketing ploy.
Understanding the classes of SD Card
There are currently two classes recognized by the SD Association: “Speed Class” signified by a number placed in a “C”, and “UHS Speed Class” signified by a number placed in a letter “U”. These classes apply to the following card formats: SD , mini SD, Micro SD, Micro SDHC, SDXC, Micro SDXC.
The formats that interested us for the new models of GoPro is the micro SDHC or micro SDXC. If you have a GoPro HD hero 2 it’s the mini SDHC which concerns you.
To clarify:
- HC means “High Capacity” (as it used to be), and runs up to 32GB.
- XC is over 32GB and currently up to 2TB.
- SD is the original card up to 2GB.
The current classes for “Speed Class” are so ridiculously obvious once you see them write alongside each other you’ll wonder why you had to ask!
Class 2:
Write speed of around 2 Mb/s
Class 4:
Write speed of around 4 Mb/s
Class 6:
Write speed of around 6 Mb/s
Class 10:
Write speed of around 10 Mb/s
Cards that have a write speed of higher than 10 Mb/s then fall into the “UHS Speed Class”, of which there is currently only one class and should carry the marks:
SDHC UHS-1
Up to 32GB
SDXC UHS-1
Above 32GB
Class 1:
Which is a 1 sat in a U.
Write speed up to 312 Mb/s.
Write Speed Basics
when you’ll GoPro Hero has to transmit all the data of the high definition video and audio that is being captured onto a means of storage, in this case the SD card , speed is crucial to ensure that there is no data loss and the camera functions at an acceptable speed for the user. Waiting for the camera to become operational again can become an issue if you are taking multiple batches of either video or multi-shot photos of passing subjects. In today’s world we expect everything to happen instantaneously, and even if the film/photo results are exceptional some of the pleasure can be taken out of the user experience during filming. So, speed matters, don’t try and save money by buying an SD card below the required specification .
Despite what your partner tells you size really does matter too. In the same way that the home computer has to search for partition space on its hard drive, an SD card also has to search for vacant memory units. The larger the capacity of the card, the less your GoPro will have to look for vacant memory units and the write speed will not begin to get dragged down due to fragmented storage.
With all that in mind, if possible do some background checks on “own brand” SD cards to find out who supplies them, because the same as supermarket food brands it’s not the retailer that manufactures them and you may find that you can get “big brand” cards with an “own brand” price tag. Just keep an eye on the vibration issue mentioned at the top of the page.
If you’re in need of more information about this type of card, the SD Association are in control of implementing all the related specifications.
by Hayden Scott | Jul 15, 2012 | Tech
Corel VideoStudio Version tested: X5
Versions available: X7, X6, X5, X5 Ultimate, X4, X4 Ultimate
 [easyazon_cta add_to_cart=”default” align=”right” asin=”B00IIL0S8W” cloaking=”default” height=”28″ key=”small-orange” localization=”default” locale=”US” nofollow=”default” new_window=”default” tag=”goprotimescom-20″ width=”120″]
Interface
All of these Corel video-editing packages open to reveal a classic interface, with preview timeline and content windows all evident. However, the workspace is also flexible allowing dual monitor set-up and the possibility to drag, drop, and stretch all the windows into the configuration that suits the user. This allows you to organize the work-flow depending on which point of the creative process you are focusing on.
The two modes provided give the opportunity to have a simplified overview for a quick drop and drag operation for less complex projects, in the case of ‘storyboard’ view, or a more in-depth multiple track ‘timeline’ view allowing the user to overlay video, stills and audio to create effects that are more visually pleasing with a good visibility of the content.
Work-flow

The track manager allows you to add or remove video and audio tracks making for effective use of the available screen area. Any added effects are indicated by an icon sitting on the timeline content giving a quick visual reference of the post-production work carried out on individual clips. Edited clips are saved as new files so the originals stay intact, whilst clips sat on the timeline can be simply dragged to increase or decrease their duration without the necessity of cutting.
The standard transitions and titles are more than adequate, if not as numerous as other packages, and the royalty free audio clips are a nice touch but should be considered as more of a showcase item as the beats can sound a little cliché. Whilst standard formats of your own music library can be imported on to the timeline, the Smart Sound audio format restricts the possibility of using your own loops in its Quicktracks library. There is also a surround mixer if you want to take the time create your ambiance.
Time-lapse and stop-motion is easily handled with a self-explanatory interface showing frame removal positions, and can be used to great effect to shorten moments you’d like to keep, but appear mind-numbingly never-ending viewed at normal speed.
The whole process is relatively smooth and the technology used can keep pace with all but the most athletic editor. Provided that you heed the minimum specification recommended for each of the products, the HD or 3D formats that are rapidly becoming the norm will not pose processor problems.
Ultimate versions have the added bonuses of being bundled with the Mercalli SE image correction and stability manager (although basic) , which is almost a must for any sports cineaste, and the Boris Graffiti titling software for the more adventurous.
Importing and Exporting
Corel VideoStudio Pro uses the classic Explorer mode to import videos, stills, and audio from all manner of devices, whether they are held on your hard drive, exterior camera, or require ripping from a CD or DVD of one of your previous projects. All content is then held in tabs and options can be switched on or off to view single formats i.e. audio only if you are concentrating on the soundtrack.
There are enough export options to suit everybody’s needs from the web to Blu-ray, passing by all the obvious mobile and tablet formats. Even 2D can be rendered into a 3D simulation. Direct uploading to social media sites is also possible.
Disc menus and chapters are no-nonsense affairs and everything is burnt without the need to export to another tool.
Corel VideoStudio offers a good street level product, a higher background spec, but a few less visual offerings. The ProX5 version is one of the first products on the market to have Sandy Bridge and Fusion CPU optimizations, along with HTML5 output, but do you really need it? If your computer is lacking the spec you’ll get better results with ProX4 and all-round performance will be better.
[easyazon_cta add_to_cart=”default” align=”center” asin=”B00IIL0S8W” cloaking=”default” height=”28″ key=”wide-orange” localization=”default” locale=”US” nofollow=”default” new_window=”default” tag=”goprotimescom-20″ width=”176″]
Pros
- Brimming with tools giving the opportunity to produce professional-looking movies.
- Create 3D movies…in a fashion.
- Versions available with Boris Graffiti titling and Mercali SE stabilizing.
- For the more adventurous there are less tracks (especially audio), transitions and objects available that other suites.
- Forum.
Cons
- Windows only.
- Can Hang or crash
by Hayden Scott | Jun 10, 2012 | Tech
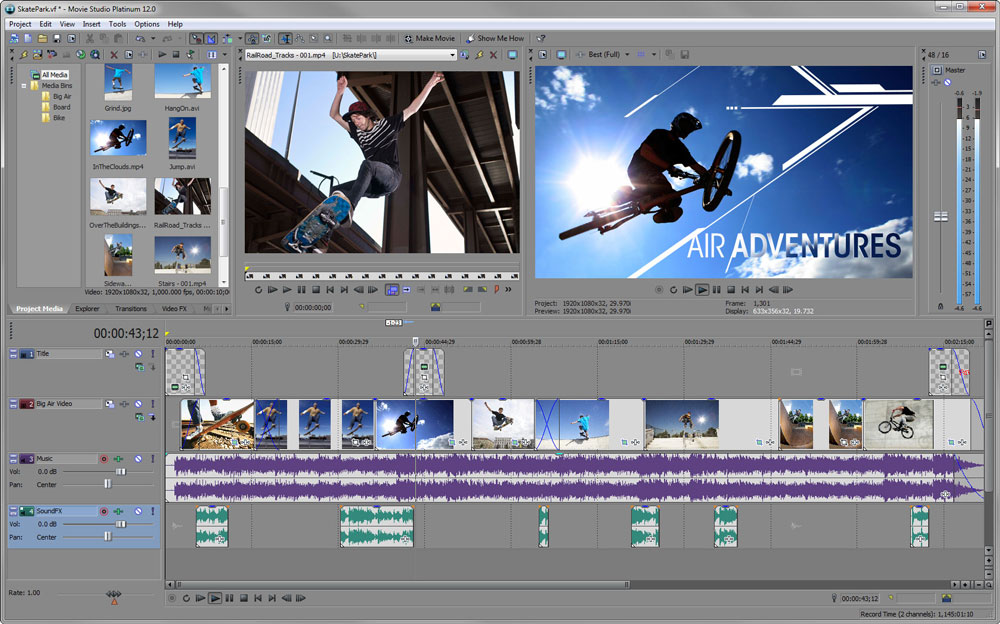
Sony Movie Studio Version Tested: Platinum Suite 12
Versions Avaiable: 12, 13
 [easyazon_cta add_to_cart=”default” align=”right” asin=”B00HRQB216″ cloaking=”default” height=”28″ key=”small-orange” localization=”default” locale=”US” nofollow=”default” new_window=”default” tag=”goprotimescom-20″ width=”120″]
The Sony video editing software comes packaged along with Sound Forge Audio Studio, DVD Architect Studio for both DVD and Blu-ray authoring…hence the Suite name. With everthing on hand, including in-program Show Me How tutorials will get you swiftly on you way for some reasonably rapid results.
Interface And Workflow
Once over the intimidating first glance the guidance from the desktop tutorials will have you up and running relatively quickly. Simple drop and drag makes it easy to place everything that’s needed on the time-line, and with over 500 transitions and effects it would be difficult to run out of choice.
As usual there’s a but; with so many transitions it seems Sony completely forgot to throw in a few templates for the less adept user. A reality that may push some potential costumers in the direction of products that at least allow them to flip a coin when deciding whether to do it the easy or difficult way. That doesn’t change the capacity of the software, it just narrows the target in terms of who would choose it. If you’re one of those, we don’t think you’d be disappointed from a creative point of view, but at this price point it’s neither entry level nor professional so tempting keen newbies without giving them the option is a little unfair.
On the upside the Magic bullet plug-in allows you to set the scene and define your style and lighting with over one hundred presets, and that has to be an advantage worth considering. It could be worth checking if your graphics card is up to the job for fully benefiting from the whistles and bells that the suite offers, as some of the more advanced feature may tax your computer.
Finding your way around the interface on your own takes more time as icon size and direct access tools are fewer than other ‘cleaner’ or more amateur targeted suites, so the workflow is maybe not as intuitive as it could be. People who have already used an entry level product will probably be more comfortable having a better knowledge of tool names and terms.
The Sony Movie Studio Platinum Suite has what it takes for the more adventurous, giving the opportunity to venture into the audio department a little deeper, which is actually not a bad thing. Plenty of add-ons to help progression to the next level of production, so it could be a choice to avoid paying premium price.
[easyazon_cta add_to_cart=”default” align=”center” asin=”B00HRQB216″ cloaking=”default” height=”28″ key=”wide-orange” localization=”default” locale=”US” nofollow=”default” new_window=”default” tag=”goprotimescom-20″ width=”176″]
Pros
- Powerful editing tool.
- Possible to customize of interface.
- Integrated audio production.
Cons
- Interface could be less complex.
- Can crash.
by Hayden Scott | Jun 3, 2012 | Tech
Magix Movie Edit Pro Version tested: 2013 Premium
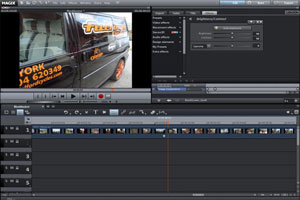 Versions available: 2013, 2013 Plus, 2013 Premium. Now goes up to version 18.
[easyazon_cta add_to_cart=”default” align=”right” asin=”B005EJ2O9W” cloaking=”default” height=”28″ key=”small-orange” localization=”default” locale=”US” nofollow=”default” new_window=”default” tag=”goprotimescom-20″ width=”120″]
Interface And Workflow
We’ve included this more advanced product as the recent price level (reductions of 50% on standard retail price) is bring it in reach of an amateur. Crop, split, and move your files around with ease, and drop and drag on to one of three work-flow interfaces. Timeline, Storyboard or Scene are the view options in this package and there is a large catalog of over 1000 templates, effects and audio clips to build up a professional looking movie.
Some thoughtful touches like the multi-cam editing, which synchronizes footage of a single scene taken from two cameras by aligning the soundtracks, gives confidence that this is a well thought through product. Stability seems a strong point as processing appears smooth and response time is good whilst moving assets and rendering. We can’t say that everything is at your fingertips as the icons appear quite small, sometimes making it difficult to find the tooling you are looking for. Video/audio files can be previewed cleanly before importing, and switching mode to get an overview of a project is instantaneous.
Color correction adjustments is impressive and easy access to them improves the overall work-flow during production. Professional looking templates are at hand, however if you want to access the full library of additional material you may have to spend a while on line to download it.
Learning support for Magix Movie Edit is available on their official YouTube channel, with a multitude of tutorials to help you reproduce the kind of effects that are within the capabilities of this product. Further technical support is available upon registration with free 12 month ‘Premium Support’.
Importing and Exporting
Full HD capacity for goes without saying when wanting to use GoPro footage, and this software promises to import mp4 directly, which it handled for us without any problems. This saves considerable time (and drive space) in the total process, as there is no need to pass through the GoPro CineForm conversion stage. Most video editing suites now claim some kind of enhanced programming to reduce the drain on system resources, especially during final render and export and Magix Movie Pro is no different. It did a good job, quickly rendering some panning, zooming, and fading projects that we ran through it.
Initially a little daunting for a beginner as the Premium version is maybe targeted towards more experienced users, however those wishing to persevere may reap the benefits of this well-priced product.
[easyazon_cta add_to_cart=”default” align=”center” asin=”B005EJ2O9W” cloaking=”default” height=”28″ key=”wide-orange” localization=”default” locale=”US” nofollow=”default” new_window=”default” tag=”goprotimescom-20″ width=”176″]
Pros
- Over 1000 templates, effects, and audio clips.
- High community subscription.
Cons
- Time spent downloading content could be a drag.
by Hayden Scott | May 10, 2012 | Tech

Selecting the correct Video Editing Hardware doesn’t have to be a painful process
One of the better approaches when looking at computer hardware specifications is to ignore any maximum ratings and pay careful attention to the minimum ones. Video storage drives normally need 7200 rpm, so hard drives rated with a minimum spin speed of 5400 rpm are probably going to be too slow. Transfer rates are also important so something that gives a good sustained throughput reigns over a computer that boasts about its peak transfer rate.
The more RAM the better. 4GB of RAM may sound good, but it’s not just your video software that’s running here; today’s operating systems also consume a good portion of this number. Bottom line, the bigger the better.
Single CPUs, whatever the rating, will generally not be as good as multiple processors, and quad core processing gives pretty big advantages irrelative of clock speed.
Storage capacity is one number that needs to be high. Whatever space you have you’re probably going to use it. If you can add more storage, do it.
In the early days of DV and HDV 5 minutes of video required around 1GB of storage space. With today’s compression formats standard HD of 1080p at 30 frames/sec is still a relatively small size (estimate around 1GB every 8 mins, or round it to 8GB/hour to be safe), but once you start adding Protune, bumping the frame rate up to 60fps or using the higher definitions (2.7K and 4K) things rapidly get out of hand. You could end up eating a 64GB SD card in no time at all. Sounds frightening, but look at your videos from five years ago and then look at the quality that you’re seeing today. That’s the price of technical evolution.
If you’re going to produce a lot of GoPro footage then you need a lot of space to store it. The best practice is always to use a dedicated drive and not the computers system drive. This will protect against data loss and speed up the editing time. You are going to notice an impressive increase in the sound and temperature of your computer as all the processing begins to take place. The drive may be spinning at a higher rate for a long period of time, and this generates a lot of internal heat; as this heat can have a negative effect on your computer the knock-on effect is negative in terms of your editing experience. Whilst even today’s laptops are now boasting a capacity capable of dealing with the editing process, placing them on a surface with good air circulation is certainly a bonus; don’t get buried under a pile of paperwork!
If you GoPro occasionally then a modern laptop may serve you well, but if you’re a fanatical user the type of computer system you’re using may become an issue so spend money wisely by considering overall use before the purchase.
Minimum Operating Requirements
This is the one thing that will hold you back more than any of the fancy effects or transitions that you think you might need. If your computer does not match or exceed the minimum requirements then enjoying glorious HD could be a painful task. That said, this is pretty standard stuff in today’s market, and most computers bought in the last few years possess this sort of hardware. If you still own a Computersaurus then locking up, dropping frames, and more crashes than the Dukes of Hazard may begin to put you off the whole process. Most software will get past with a configuration as below, but you’d always be better to shoot higher. If you think you’re on the limit we’ll soon be adding a page on the latest hardware to help you out.
For the new GoPro you’d better shoot high and look at equipment with:
- An Intel Core i5 or Intel Core-2 Quad system with discrete NVidia or ATI cards.
- 4GB RAM.
- Updated/Latest version of default video player from Microsoft or Apple.
Note:
If you experience problems ensure your player’s Codecs are up to date. At the 1440 resolution and above the video often won’t play from Windows Explorer and simply requires importing to CineForm to view, so don’t get too frustrated.
Output from older GoPro should be OK with this:
- 2 GB RAM (4 GB recommended).
- 4GB of available hard disk.
- Graphics card, 512 MB GPU memory (1 GB or higher recommended).
- DVD-ROM drive (compatible DVD burner required to burn DVDs; compatible Blu-ray burner required to burn Blu-ray discs).
- Internet connection required for Internet-based services.
If you also use other equipment as well as GoPro consider:
- 1394 FireWire® cards if you use other cameras (DV/D8/HDV™ camcorders).
- USB Video Class (UVC) for DV cameras.
Wi-Fi, Android, and iOS
There’s so many phones and tablets out there that we really can’t even scratch the surface on this one for now. It’s a new functionality and we know that GoPro have had a few teething issues; they are working incredible hard to resolve these and we wish them godspeed.
Our initial experience with the Wi-Fi has been mixed with some problems of communication loss between the camera and the remote during use. We don’t know whether this is a battery power issue as testing was done in winter conditions (cold can effect battery performance), or it’s an actual communication issue caused by software compatibility. We’ve also been using the App on Android models for now and we’ll continue to bring you updates.
by Hayden Scott | May 9, 2012 | Tech
Want to save some money? A GoPro Homemade Mount Could Be The Answer
You’ve got a bag full of goodies…but for now all you can do is just stick them to all the obvious places. Side or top of your helmet, right… everyone goes for that! It’s a POV! Yep, you’re not wrong. But not everyone’s POV is the same, so get in the garage and knock yourself up the Daddy of all mounts!
And don’t forget, we can never cover all sports ourselves so if you have some good ideas from your discipline, send them in and maybe we’ll add it.

Homemade Chesty
In this case all you need is the box your GoPro arrived in…
The GoPro team may be looking to sell their own chesty, but I think it’s the sign of a quality product that they knowingly give you the basics of one in presentation box.
- Tucked under its perspex case is the box-mount used to display your shiny new toy. If you’ve got a drill or a soldering iron and some old rucksack/school bag straps, then you have everything you need to knock yourself up a Chesty and use the extra cash to fund other things like SD cards.
- Take a look at the real thing and you’ll see that you’ve got one strap around the core and one over each shoulder.
- Finding a strap should be pretty easy. Most people have a 20-year-old rucksack that they kept ‘because you never know’. And if you’re too young for that then go in the cupboard and pull out the old school bag that saw all that abuse during college. If you’ve got a friend in marketing or congress, these people hand out the company info packs in cheap backpacks/bum bags/id neck leashes all the time…odds are you’ll get some straps at zero cost from somewhere…
- Using either a drill or a soldering iron all you have to do is drill/melt four slots. One each side and two on the top.
- The rest is down to the sewing. If you’re not the best seamstress in the world then phone a friend, neighbor…or just ask a complete stranger in the street; it’ll save you £$€40 on the real thing.

Homemade Bar Mount
Handle-bar, cross-bar, roll bar, draw bar…or just the golf club bar!
Get down the hardware store and grab yourself the things on this list. Have an idea of what you want to fix things to so that you have some sort of dimension in mind. Also remember that steel/aluminium sections are normally sold in 1 meter lengths, so this means that you’ll have enough for several applications (unless you have something unusual in your head).
Square section hollow tube:
Steel or aluminium depending on needs, 15 to 20 mm cross-section is good for most brackets. Don’t get anything that will bend.
Long bolts: Again, it’s down to your fixing point but if you buy long you can cut them down; buy short and you limit your choices.
Small counter-sunk screws: 3 mm works great.
Duct tape/rip repair tape/plumbers tape: Water-proof can be a safer option, depending on where you live/what you do.
You should be able to pick all that up for around £$€15. If you can’t, use a different hardware store…somewhere the owner doesn’t drive a Porsche.
If you didn’t already have a real design in your head then get some measurements down on paper. A drill, saw, and file should be enough to do the job.
The better you get the profile of the object that you’re fixing to the better the bracket will hold in place. This is the advantage over the actual GoPro roll-bar mount as you can gear it to object in question. A basic semi-circle or a V may do the job, so save yourself some work by using your head before your elbow grease.
Off to the shed.
- Measure and cut length.
- Cut profile.
- Drill holes.
- Fit GoPro base and secure with screw.
- Finish off with protective tape.
The example in the photo took around 45 minutes to make (not including shopping). Unless you have been particularly greedy with your bar you should get four or five different mounts out of it; money well spent!

Homemade Seat/Pole Mount
Facing forwards, facing backwards! Swing it like the real thing with a homemade convertible seat/pole mount
Every biker has a bag of broken parts…put them to good use!
Seat mount for bikes
If you didn’t already knock up a seat post mount for your bike with the bar that you bought then here’s another option. We love the film that comes from these because it really inspires the person chasing to get a close as possible; and as we all know, the harder we try the more interesting the footage becomes!
You’re a keen cyclist? Chances are you’ll have an old clip from either a lamp, a tool bag or an actual seat clamp that’s going spare. If you mountain bike chances are you’ll have so many of these broken items lying around in the hope that “next time I’ll break the other half of the clip and that will make me a pair again” that you be happy to finally do something with them.
It is always better to secure your mounts with something really solid, so if you have the option of a metal fitting that’s not too heavy then it’s the way to go. Some might say that there’s a risk to the GoPro housing as it’s more likely to break than the metal bracket, but if you want to look through hours of footage that was ruined by vibration that’s a choice you have to make.
So even if the body of the bracket is plastic, as the one seen in the photo, it can be stiffened up by using a metal clamping plate.

Pole mount using the bike seat clip
Once you take the under-seat mount off you can grab the quick-release from your seat.
Use it in place of one of the screws that secures the seat mount and you can now use it to clamp on to varying sizes of pole, be that a ski pole, a simple branch if you are out in the field, or on a pair of crutches if the last session didn’t quite go as planned.

Homemade Go Anywhere Bulldog Clip
Straight out of the office draw
This one is really a go-anywhere mount that you can clip to anything from your finger to your boots. Why spend money on a tripod when you can a household item and clip this to the back of a chair?
Hands up if you don’t have an IKEA store in your town. OK, you people can leave the room and go out into the back garden which is probably a desert, a mountain, or a river, as everywhere else has an IKEA. OK, we don’t know where you live, but the chances are that if you ever bought a modern day piece of flat-pack furniture you’ll always have some fixings left in the bag. Gone are the days of going back to the store to ask for missing parts; its cheaper to give you two of everything than pay the salary of an over-sized customer service department.
So here we go:
- Using only two left-over jointing plates from an IKEA curtain rail and the bulldog clip from your sons art portfolio (he may miss it, but chances are he’s fourteen and more concerned with his hair and his spots).
- Put one plate either side the clip, top or side mounting is up to you, but it’s easy enough to change around.
- Screw one end together using the grub-screws or bolts that should be holding you furniture together. No, it’s a joke, there should be spare ones of these as well.
- Using either the 3 mm counter-sunk screws that you bought earlier, or a 4 mm one that will screw directly into the IKEA plates, drill and secure the GoPro base. Obviously, the sizes depend on the furniture supplier, but we guess you get the idea.
We admit we got a little fancy with this by adding an old tripod head at a later stage, but once you start you just can’t help trying something else.
Now you can clip your GoPro to all sorts of things, from the fence to the back of your mate’s trousers.
 Loading...
